Step 1.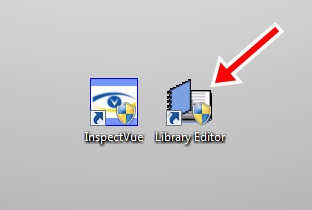
|
First, let's start by making a copy of the library we will be modifying. This way, if any mistakes are made we will not run the risk of damaging our Primary Library. To do this, we need to open the Library Editor. |
|
Step 2.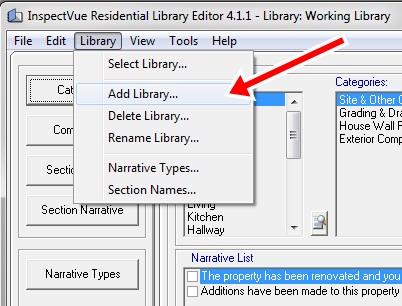
|
Once the Editor is opened, click on "Library" at the top and select "Add Library". |
|
Step 3.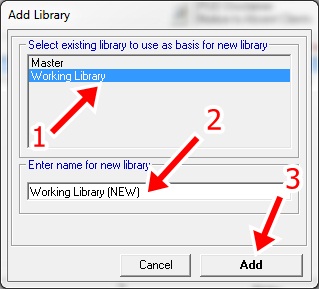
|
Protect your Library
|
|
Step 4.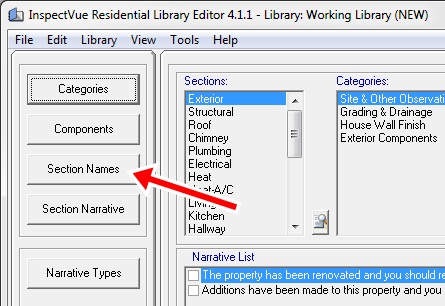
|
You should be in your NEW library now. You can verify this by glancing at the top window border. It should tell you the library you are working with. In this case, it's Working Library (NEW), then select "Section Names". |
|
Step 5.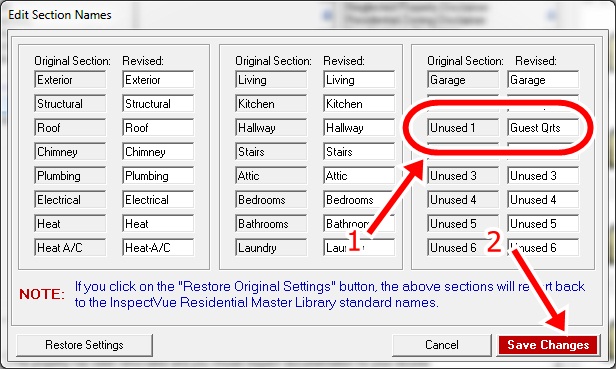
|
Create a New Section
|
|
Step 6.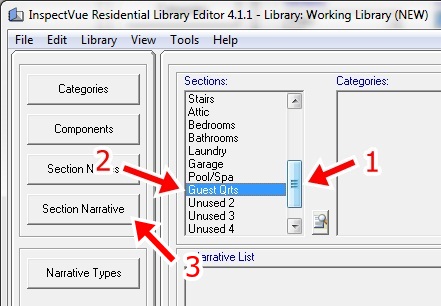
|
|
|
Step 7.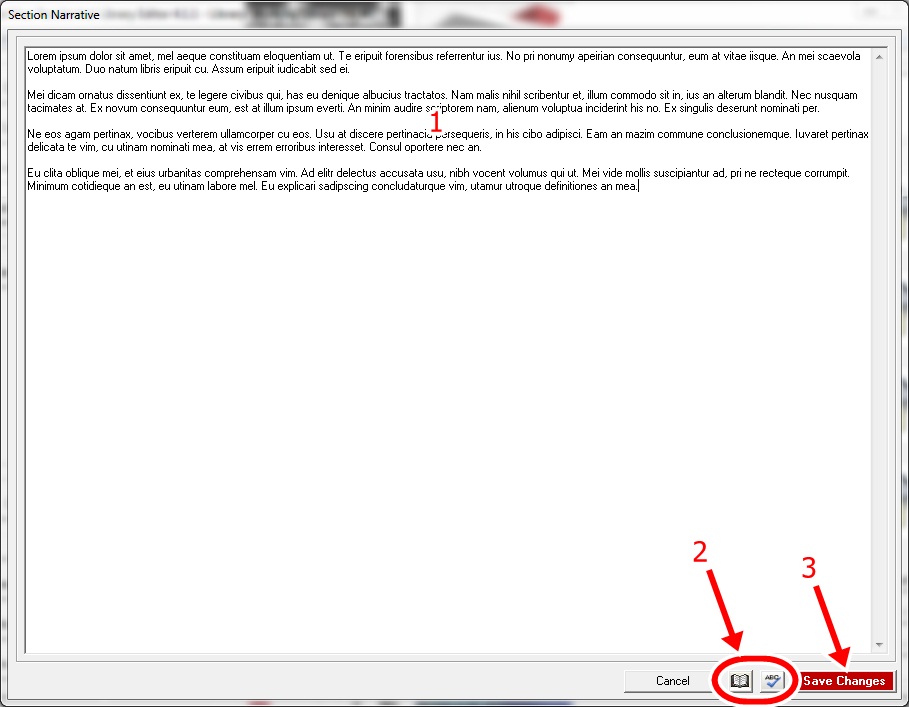
|
This step is Optional but is reccomended as all other Sections have a General Narrative.
|
|
Step 8.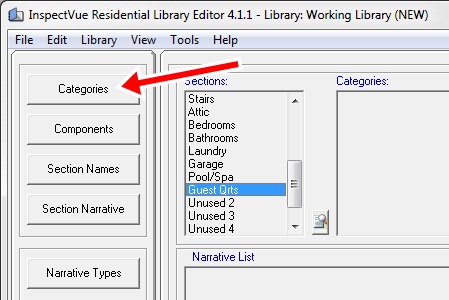
|
Now we will need to click on the "Categories" button. |
|
Step 9.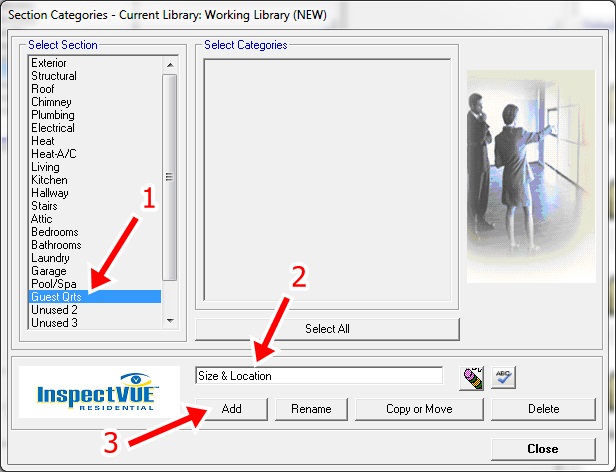
|
Adding Categories
|
|
Step 10.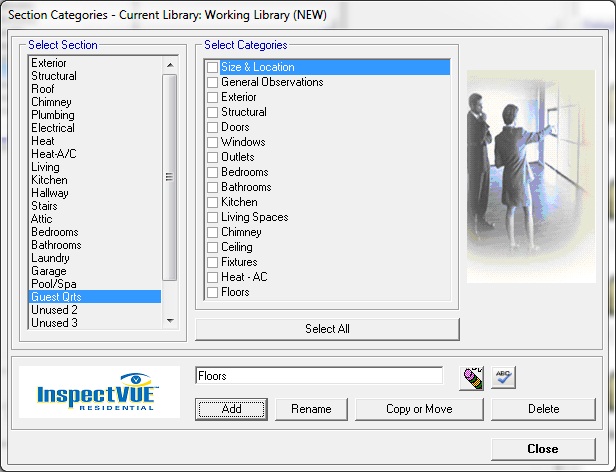
|
Click on the image to the left to enlarge. Note: These Category Names are only for reference purposes only. Your names may vary. |
|
Step 11.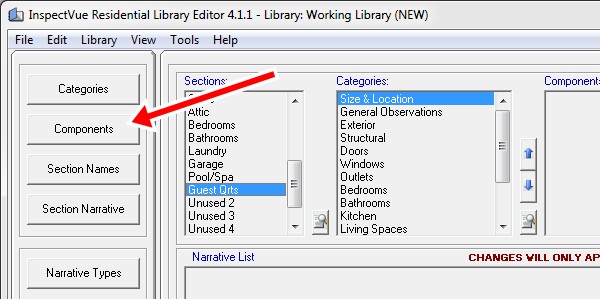
|
The process to add Components is just like that of Categories Click on the "Components" button |
|
Step 12.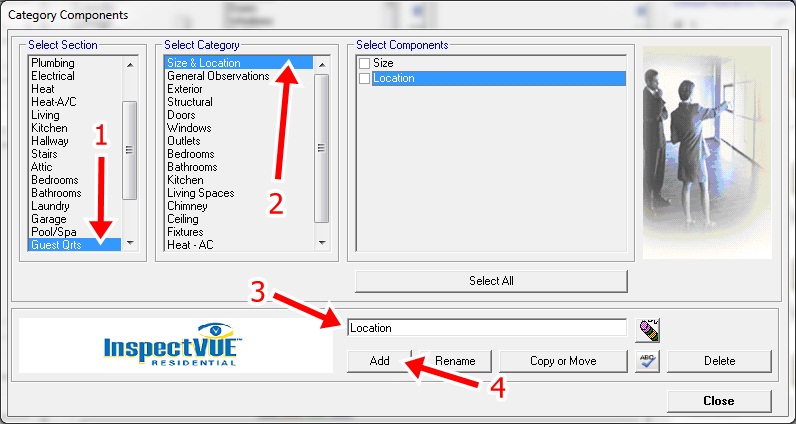
|
Click on image to the left o enlarge
|
|
Step 13.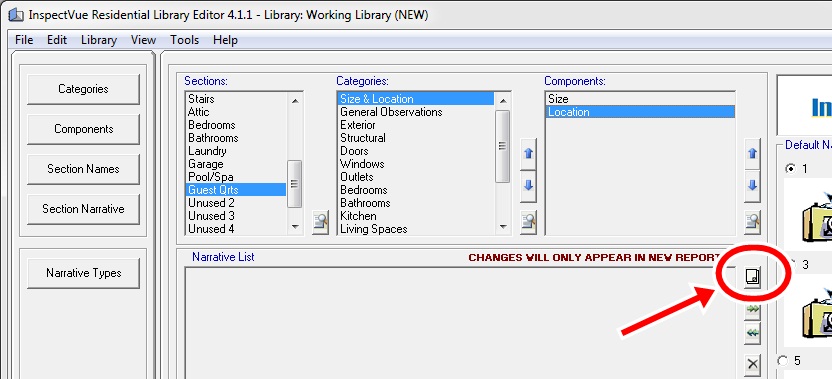
|
Adding Narratives Ensure you select the Component you wish to add Narratives to and click on the "New Narrative" Button (Shown circled in left image) |
|
Step 14.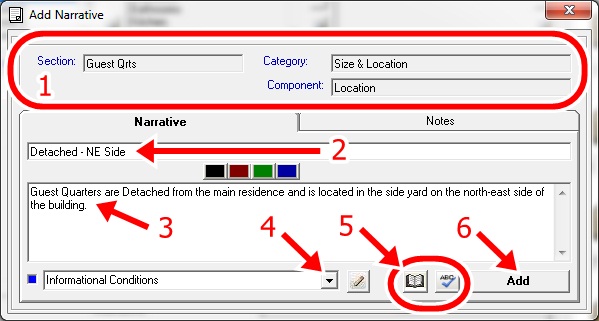
|
|
|
Step 15.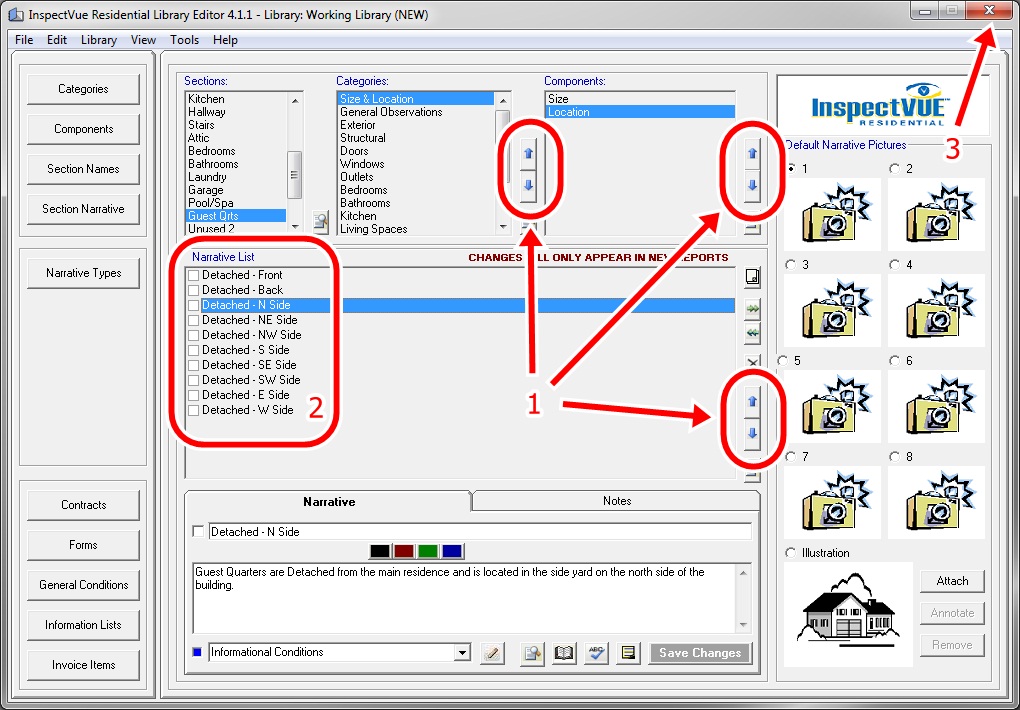
|
Last Looks
|
|
Step 16.
|
Next, open InspectVue™ Report Writter |
|
Step 17.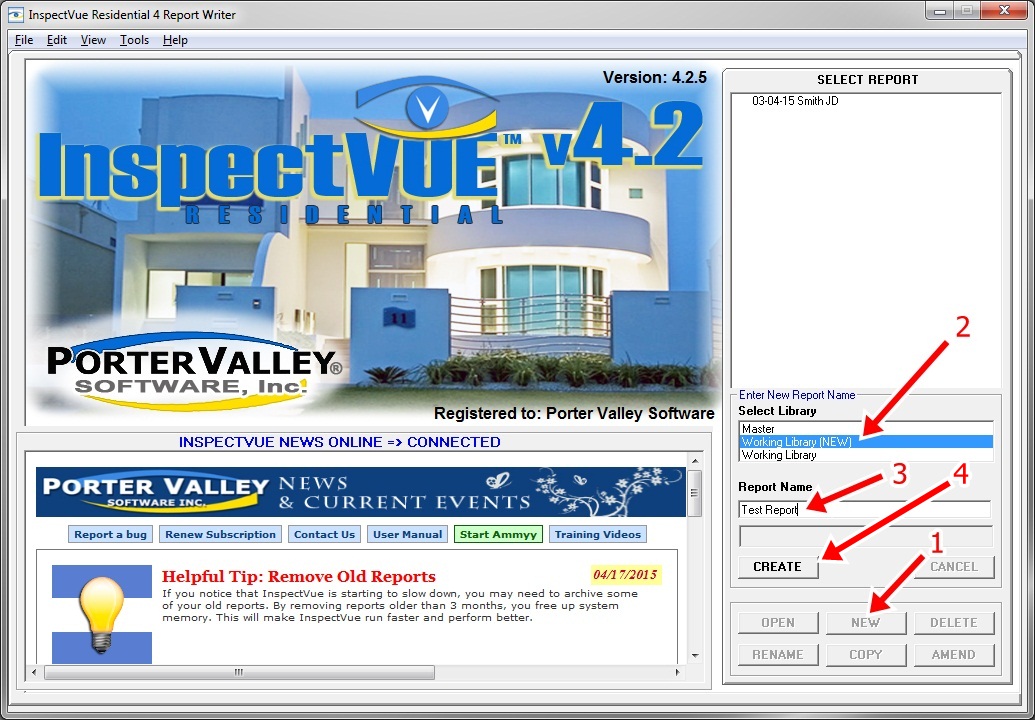
|
Click left image to enlarge
|
|
Step 18.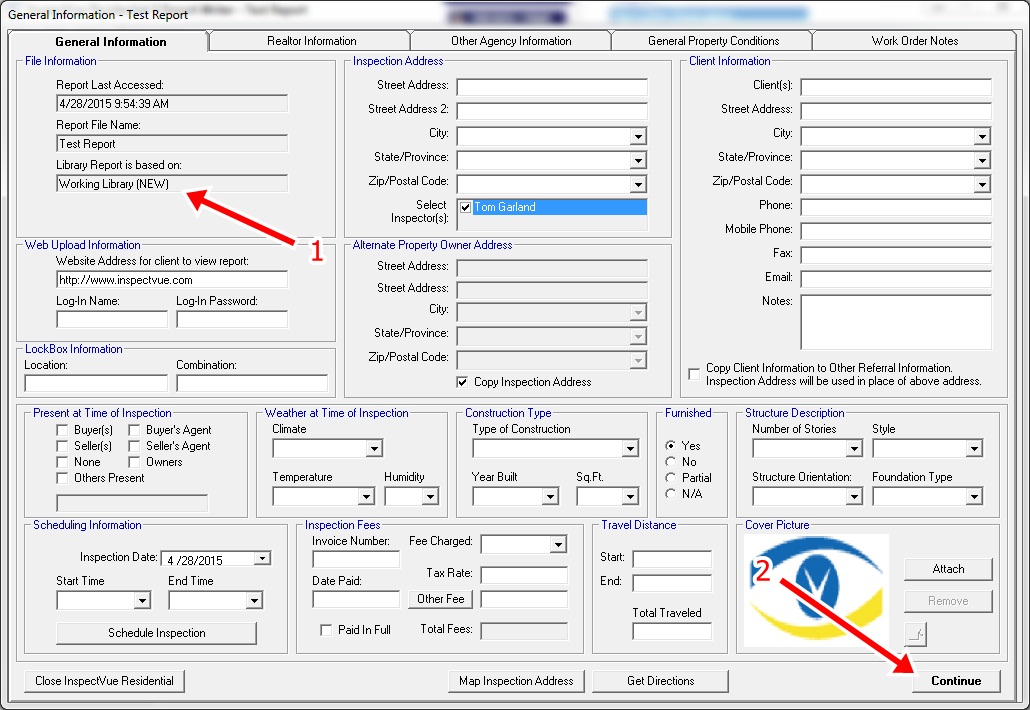
|
Click image on left to emlarge
|
|
Step 19.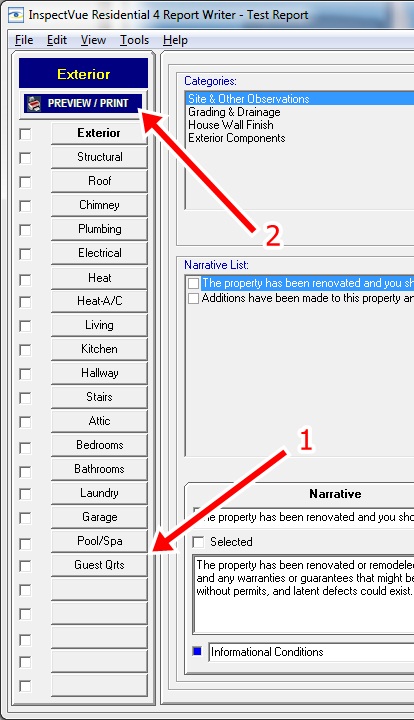
|
Renaming our New Section.
|
|
Step 20.
|
Click on the "General Print Options" button. |
|
Step 21.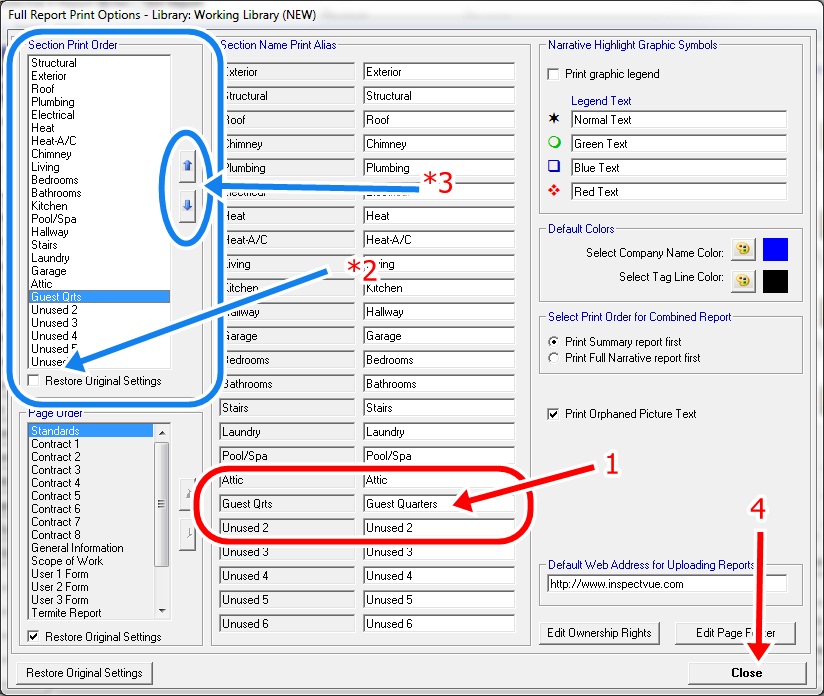
|
Make it look Professional - Click left image to enlarge.
|